
How to Clean Retro Game Cartridges Safely: NES, SNES, N64, Game Boy, Sega Genesis, Atari & ColecoVision
Quick Summary
Retro cartridges are wonderfully durable, but they are not invincible. If a game will not load, loads inconsistently, or only works after being removed and reinserted a few times, dirty cartridge contacts are one of the first things worth checking.
Here are the big takeaways:
-
Do not blow into cartridges. It was a childhood ritual for a lot of us, but moisture does not belong near cartridge contacts.
-
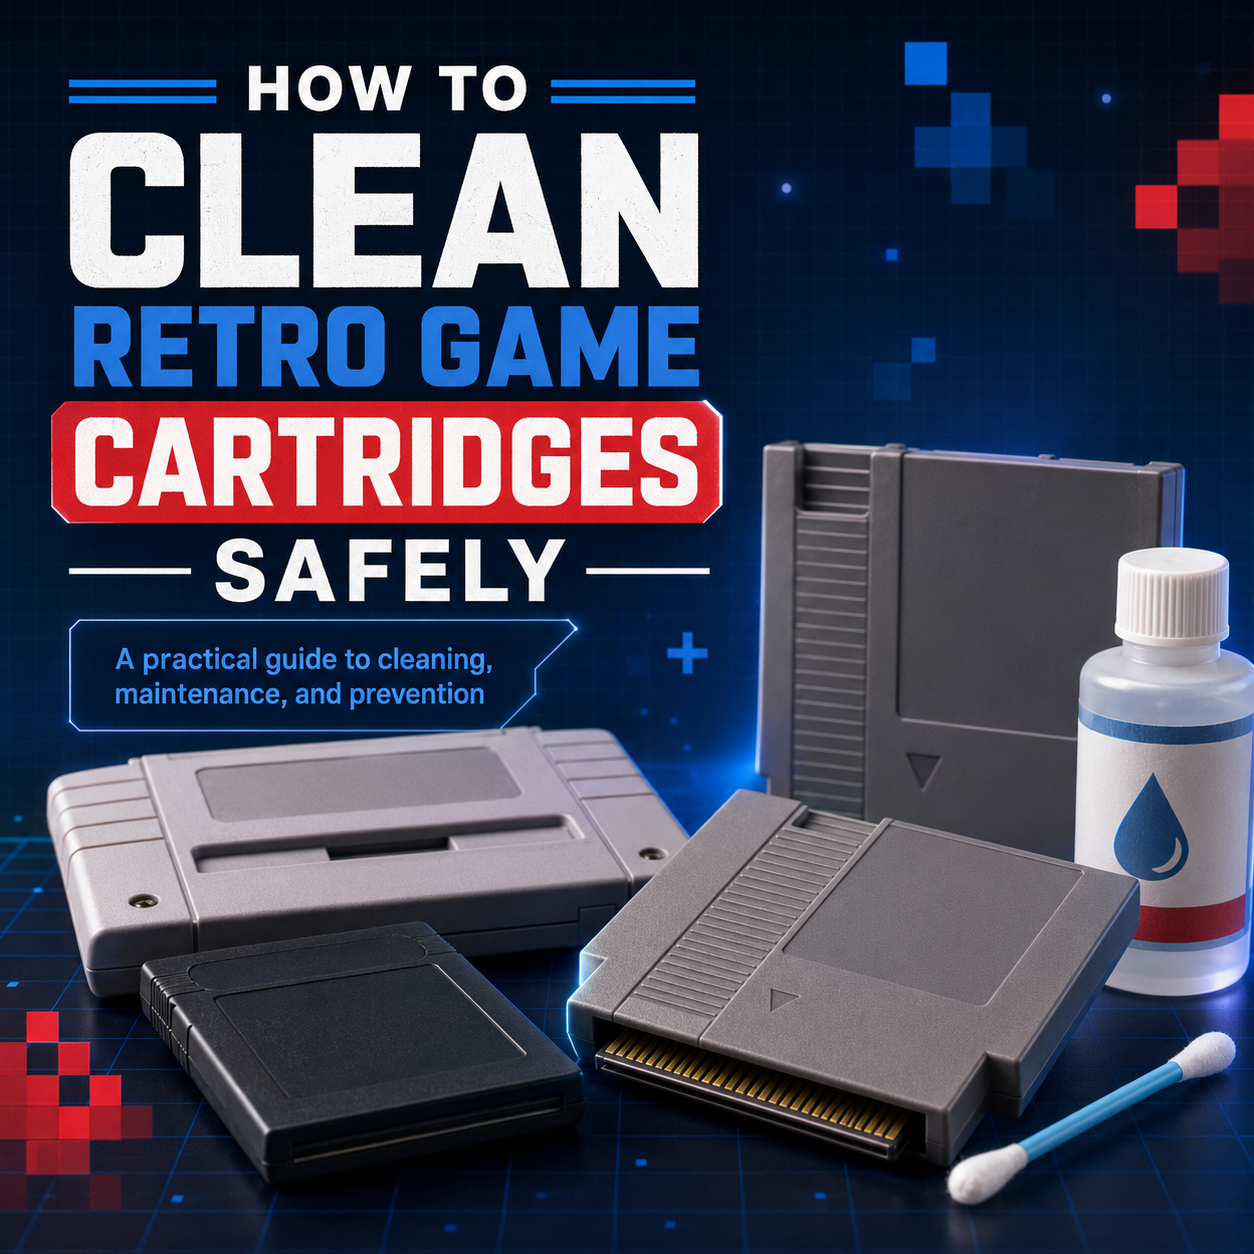
Clean the contacts gently and only when needed. A little high-concentration isopropyl alcohol on a swab is usually enough for basic maintenance.
-
Clean used cartridges before putting them into your console. That keeps old grime from being transferred into the system’s cartridge slot.
-
Let the cartridge dry fully before testing it. Never insert a cartridge while the contacts are still damp.
-
If several different games are acting up in the same console, the console’s cartridge slot may also need attention.
-
Avoid aggressive “restoration” methods for routine cleaning. Sanding, polishing compounds, and other harsh methods are not where you should start.

Why Cleaning Your Cartridges Matters
If you ever blew into a cartridge hoping it would magically start working, you are absolutely not alone. It was practically a sacred ritual in the NES era. The problem is that it was never a great idea.
Cartridge-based games rely on a clean physical connection between the metal contacts on the game and the connector inside the console. Over time, those contacts can pick up dust, skin oils, grime, residue from poor storage, and other contamination that interferes with that connection. When that happens, a game may fail to boot, show graphical glitches, freeze, or only load after several attempts.
A careful cleaning will not fix every dead cartridge, but it is one of the simplest and most effective first steps when a retro game starts acting unreliable.
Before You Start: Is the Cartridge Actually the Problem?
Before cleaning a cartridge over and over, do a quick sanity check.
Try another game in the same console
If a different cartridge works normally, the troublesome cartridge is a good place to focus.
Try the problem cartridge in another console, if possible
If it fails in more than one system, the cartridge is more likely to be the issue.
Watch for a pattern
If many cartridges are glitchy, fail to load, or need to be inserted repeatedly before they work, the console’s cartridge slot may also be dirty, worn, or in need of service. Cleaning the cartridge is still worthwhile, but it may not be the whole story.

What You’ll Need
For a basic cartridge contact cleaning, you do not need anything fancy.
-
Isopropyl alcohol, ideally 90% or higher
-
Cotton swabs or foam swabs
-
A clean, dry lint-free cloth
-
A small dish or tray for screws, if opening the cartridge
-
The correct security bit or screwdriver, only if you plan to open the shell
-
A soft brush, only for deeper cleaning after a cartridge has been opened
What to avoid
For everyday maintenance, skip the risky stuff:
-
Do not blow into the cartridge.
-
Do not soak the contacts.
-
Do not spray liquid directly into the cartridge shell.
-
Do not use household cleaners on the contacts.
-
Do not start with sandpaper, metal polish, or heavy abrasives.
-
Do not force open a cartridge without the proper tool.
If you are dealing with severe corrosion, physical damage, or a cartridge that is valuable enough that you do not want to gamble, it may be better to stop and seek experienced repair help.

Step-by-Step: Basic Cartridge Contact Cleaning
This basic method applies well to many cartridge-based systems, including:
-
NES
-
Sega Genesis / Mega Drive
-
Many other cartridge formats with accessible edge contacts
1. Power off the console and remove the game
Never clean a cartridge while it is inserted into a console.
2. Inspect the cartridge contacts
Look at the exposed contact edge. You may see visible dirt, dark residue, fingerprints, or a dull film. Some carts will look relatively clean but still benefit from a light pass if they are behaving unreliably.
3. Lightly dampen a swab with isopropyl alcohol
The swab should be damp, not dripping. If there is excess liquid, squeeze or dab it off first.
4. Gently clean both sides of the contact edge
Rub the swab across the cartridge contacts using controlled strokes. Do not jam the swab aggressively into the cartridge opening. You will often see brown, grey, or black residue come away on the swab.
5. Switch to a clean part of the swab and repeat
Keep cleaning until the swab stops picking up obvious grime. For a cartridge that has spent decades in a basement, attic, garage, or dusty storage bin, that may take more than one swab.
6. Let the cartridge dry fully
Give the contacts time to dry completely before testing the game. Do not rush this part.
7. Test the cartridge
Insert the cartridge normally and power on the system. If it still fails to load, repeat the basic cleaning once more before assuming the cartridge is damaged.
Why a Clean Cartridge Helps Protect the Console Too
A dirty cartridge does not just have trouble making a good connection itself. It can also transfer grime into the console’s cartridge slot. Over time, that can make the system increasingly finicky, even with otherwise clean games.
That is why it is a smart habit to give newly purchased used cartridges a quick inspection and cleaning before inserting them into your system. It is a small step that helps protect both the game and the console.

When to Open a Cartridge for a Deeper Clean
Most cartridges do not need to be opened for normal cleaning. Start with the exposed contacts first.
Opening the shell becomes more useful when:
-
The cartridge is still unreliable after a careful external cleaning.
-
Dirt or debris is visible inside the cartridge shell.
-
There is evidence of liquid exposure.
-
You can see corrosion, unusual buildup, or contamination on the board.
-
The shell is filthy enough that a more complete clean is worth doing.
Basic deep-cleaning process
-
Use the correct bit or screwdriver for that cartridge shell.
-
Remove the screws carefully and keep them somewhere safe.
-
Separate the shell halves gently. Do not yank them apart.
-
Lift out the circuit board by its edges. Avoid touching the contact area or components unnecessarily.
-
Clean the contact edge more thoroughly with a lightly dampened swab.
-
Inspect the board for green or white corrosion, damaged traces, cracked solder joints, rusted metal pieces, or anything that looks physically wrong.
-
Use a soft brush with a small amount of isopropyl alcohol only where needed for light surface grime on the board.
-
Allow everything to dry completely before reassembly.
-
Reassemble the cartridge carefully and test again.
When cleaning stops being enough
If you see heavy corrosion, broken traces, a damaged board edge, missing components, or a cartridge that remains dead after reasonable cleaning, the problem may require actual repair rather than more scrubbing.
Cleaning solves contamination. It does not rebuild damaged electronics.
System-by-System Notes
NES Cartridges
NES games are famous for being fussy, and the cartridge often gets blamed first. A careful contact cleaning is absolutely worth doing, but if a large number of clean NES cartridges still load inconsistently, the console’s connector may also be part of the problem.
For the cartridge itself, clean both sides of the contact edge thoroughly and avoid over-wetting the swab. If an NES cartridge has a lot of debris inside the shell, opening it can make a deeper cleaning much easier.
Super Nintendo Cartridges
SNES cartridges usually respond very well to straightforward contact cleaning. Their contact edge is easy to access, and a small amount of grime can be enough to cause intermittent boot issues.
As always, stay away from labels and do not let liquid run into the shell.
Nintendo 64 Cartridges
N64 cartridges can also become unreliable when the contacts are dirty. A gentle cleaning of the exposed contact edge is the right first move.
If an N64 game is still inconsistent after cleaning, test it in another known-working N64 console before assuming the cartridge itself has failed.
Game Boy, Game Boy Color & Game Boy Advance Cartridges
Handheld cartridges are small, which makes them easy to overlook, but they gather the same kind of grime as full-size carts. Because the contact area is compact, use a controlled touch and avoid flooding the opening.
These are also especially likely to have travelled through pockets, storage bins, childhood backpacks, and years of loose handling, so a cleaning pass on second-hand purchases is a very good idea.

Sega Genesis / Mega Drive Cartridges
Genesis cartridges use the same basic principle: the console needs a reliable connection to the cartridge’s contact edge. If a Genesis game boots to a black screen, behaves inconsistently, or only works after reseating, cleaning the contact edge is a sensible first step.
The cartridges are often easy to handle during basic cleaning, and larger shells can sometimes hide more internal dust than you would expect if they have been stored poorly.
A Smaller Note on Atari 2600 and ColecoVision Cartridges
They may not get as much attention as NES, SNES, or Genesis games, but Atari 2600 and ColecoVision cartridges deserve the same care.
Atari 2600 Cartridges
Atari 2600 cartridges can vary in how easy the contacts are to access. Some designs include a protective dust door or plastic shutter that partially blocks the connector area when the game is not inserted into a console. If the contacts are not easily reachable, do not force anything just to jam a swab inside. A more careful approach, cartridge disassembly, or experienced help may be safer.
Because Atari cartridges are now several decades old, also be cautious around brittle plastic, fragile labels, and shells that have endured a lot of storage wear.
ColecoVision Cartridges
ColecoVision cartridges use a similar contact-based approach and can benefit from the same careful cleaning principles when the contacts are accessible. Clean gently, avoid over-wetting, and remember that the age of both the game and the console can play a role in loading issues.
If multiple ColecoVision cartridges act up, do not immediately assume every game is faulty. The console itself may need inspection too.
Cleaning the Cartridge Shell
The plastic shell deserves some attention, especially on used games, but treat it differently from the contact area.
For a cartridge you are not opening
Use a soft, lint-free cloth that is only slightly damp. Wipe the plastic gently and keep moisture away from:
-
Labels
-
Seams in the shell
-
The cartridge opening
-
Printed artwork or fragile decals
For a cartridge you have opened
If the board has been removed, the empty plastic shell can be cleaned more thoroughly. Even then, labels and vintage plastics deserve caution. The goal is to make the cartridge presentable without risking cosmetic damage.
Do not spray cleaners directly onto a cartridge, and do not soak assembled games.
How Often Should You Clean Retro Cartridges?
Here is the best rule: clean cartridges when there is a reason to clean them.
A cartridge that works perfectly, has clean-looking contacts, and is stored well does not need constant attention. Over-cleaning is not a badge of honour.
Good times to clean include:
-
When you first buy a used cartridge
-
When a game will not load or loads inconsistently
-
When a cartridge came from dusty, damp, or questionable storage
-
Before testing a lot of newly acquired games in one of your consoles
If it is already clean and working, let it live its little retro life in peace.

Preventing Future Buildup
A few good habits help your cartridges stay reliable for much longer:
-
Store games in cases, protective boxes, or dust-free shelving.
-
Keep them away from heat, damp basements, garages, and high-humidity areas.
-
Handle cartridges by the shell, not by the contacts.
-
Clean newly acquired used games before adding them to your regular rotation.
-
Do not force cartridges into a console. If something does not feel right, stop and check the alignment.
-
Keep the surrounding console area clean. Dust around the console eventually becomes dust inside the console.
Final Thoughts
Cleaning retro game cartridges is one of the simplest ways to improve reliability and protect your collection. You do not need to overcomplicate it. Start gentle, use as little liquid as possible, let the cartridge dry fully, and know when a problem has moved beyond cleaning and into repair territory.
A well-kept cartridge can keep loading properly for decades. That is part of the joy of physical game collecting: these little plastic bricks were built to last, and a bit of sensible care helps them keep doing their job.
Looking for retro games, cleaning supplies, or cartridge protection for your collection? Power Up Gaming carries a wide range of retro gaming products to help you keep your collection organized, playable, and ready for another run.
FAQ: Cleaning Retro Game Cartridges
Is blowing into a cartridge actually bad?
Yes. It became a famous gaming habit, but it is not a good cleaning method. Moisture from your breath does not belong around cartridge connectors. If a game is not loading, remove it, inspect it, and clean it properly instead.
What is the best thing to use for cleaning cartridge contacts?
For this type of home cleaning, a lightly dampened swab with high-concentration isopropyl alcohol is a practical choice. Use very little, avoid dripping, and let the contacts dry fully before testing the game.
Can I use 70% isopropyl alcohol?
It is better to use a higher concentration when cleaning cartridge contacts. Lower-concentration alcohol contains more water, so it is not the first choice for this job.
Can I use an eraser on cartridge contacts?
For routine cleaning, we would not start there. A swab and isopropyl alcohol are gentler and usually enough. More aggressive methods should be reserved for unusual cases where ordinary cleaning has failed and you understand the risks.
Should I use sandpaper or metal polish on a cartridge?
Not for normal cleaning. Those are aggressive methods and can do more harm than good if used casually. If a cartridge is badly corroded, it may need careful restoration or repair rather than general maintenance.
Should I open every cartridge I clean?
No. Most games only need a basic contact cleaning, if they need anything at all. Open a cartridge only when there is a real reason, such as visible debris, contamination inside the shell, or ongoing problems after careful external cleaning.
What if the game still does not work after cleaning?
Test another game in the same console. If several games fail, the console may be the issue. If only one cartridge fails even after cleaning, the cartridge may have a deeper board-level problem.
Can dirty cartridges make my console act up?
Yes, they can contribute to a dirty cartridge slot by transferring grime into the console. That is why it is smart to clean used cartridges before repeatedly testing them in your system.
Can I clean Sega Genesis, Atari 2600, and ColecoVision cartridges the same way?
The basic idea is the same: gently clean accessible contact edges, use minimal liquid, and let the cartridge dry completely before testing. Atari 2600 cartridges can be a little trickier because some designs limit access to the contacts, so do not force a swab where it does not naturally fit.
Does cleaning a cartridge hurt its collector value?
Careful, sensible cleaning usually helps preserve a game. Careless cleaning can absolutely hurt value, especially if labels get wet, screws get chewed up, shells get damaged, or contacts are aggressively abraded. Clean like a caretaker, not like you are scrubbing a frying pan.